
More than 60 percent of American corporate event planners name scheduling conflicts as their biggest obstacle when organizing multi-day retreats. With teams scattered across different locations and calendars, finding dates that work for everyone can quickly become a frustrating process. This article outlines a practical, step-by-step approach designed to simplify participant coordination, reduce time spent juggling availability, and help you create events that achieve your organizational goals.
Table of Contents
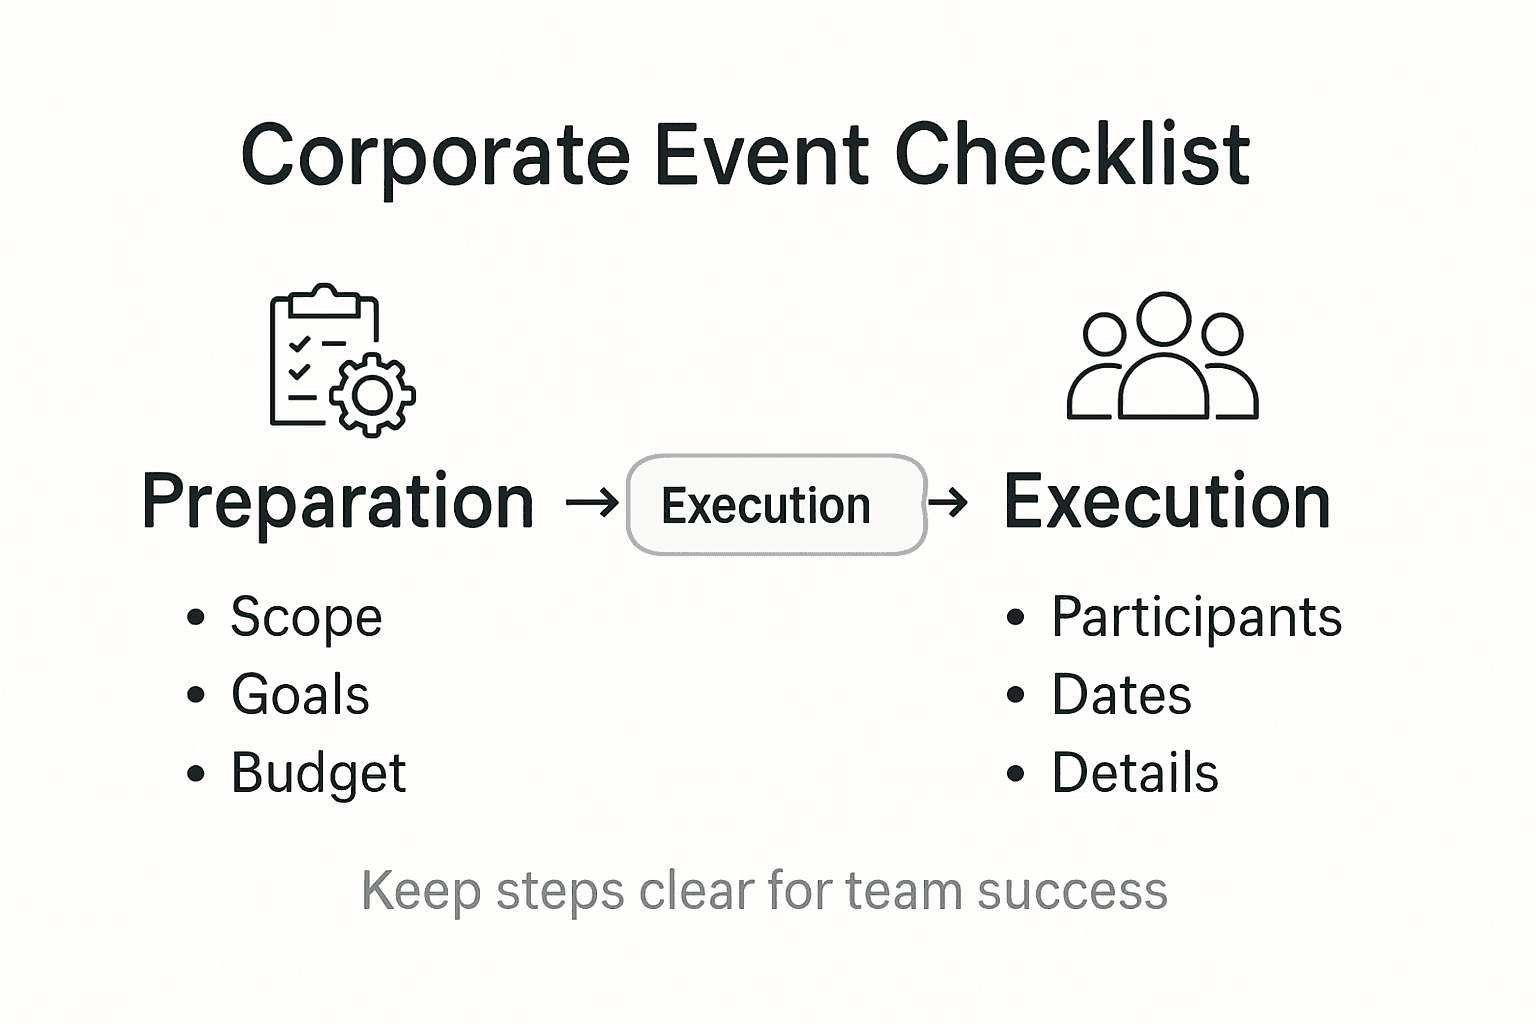
- Step 1: Define Event Scope And Requirements
- Step 2: Gather Participant Information And Constraints
- Step 3: Set Up Event In Whennot And Share Link
- Step 4: Review Participant Responses And Identify Optimal Dates
- Step 5: Confirm Schedule And Share Final Event Details
Quick Summary
| Essential Insight | Clarification |
|---|---|
| 1. Define clear event objectives | Establish the primary purpose and specific goals to guide planning and ensure success. |
| 2. Collect participant details comprehensively | Utilize a digital tracking system to gather essential information like availability and dietary needs for better event planning. |
| 3. Use WhenNOT for scheduling | Create your event in the WhenNOT platform to facilitate dynamic scheduling based on participant availability and preferences. |
| 4. Review and analyze responses effectively | Evaluate participant input to identify optimal dates, considering logistical factors beyond simple availability. |
| 5. Communicate final event details clearly | Send a detailed confirmation of the event's schedule, location, and logistics to all participants for transparency and alignment. |
Step 1: Define event scope and requirements
Crafting a successful corporate event starts with understanding exactly what you want to accomplish. This initial stage is about setting clear parameters that will guide every subsequent planning decision. Event management involves strategically studying your brand, target audience, and event concept to create an experience that meets your organizational objectives.
To define your event scope, start by asking critical questions. What is the primary purpose of the event? Are you hosting a team building retreat, an annual conference, or a client appreciation gathering? Clarify the specific goals first. Your event's purpose will shape the mood, atmosphere, and overall experience, so take time to articulate exactly what success looks like. Consider factors like expected attendee count, desired outcomes, budget constraints, and key performance indicators you want to measure.
Once you have outlined the fundamental goals, document your requirements in a detailed project brief. Include specifics about target audience demographics, preferred dates, potential venues, technology needs, and any unique considerations specific to your corporate culture. This comprehensive overview will serve as your north star throughout the planning process, helping you make informed decisions and maintain focus.
Pro tip: Create a one page summary document that captures your event's core purpose and key requirements to share with stakeholders and keep everyone aligned throughout the planning process.
Step 2: Gather participant information and constraints
Now that you have defined your event scope, the next critical step is collecting comprehensive participant details to ensure smooth planning and coordination. Effective communication plays a pivotal role in gathering participant information and managing constraints, enabling you to build a strategic approach to your corporate event logistics.

Start by creating a detailed participant tracking mechanism. Administrative systems can help you view participant lists, track registration statuses, and perform targeted searches that capture essential information. Develop a standardized data collection method that captures key participant details such as full name, job role, contact information, dietary restrictions, accessibility needs, and most importantly their potential availability windows. Consider using digital tools or survey platforms that make it easy for participants to input their constraints and preferences quickly and securely.
When collecting participant information, focus on understanding both professional and personal constraints that might impact event attendance. This includes work schedules, travel limitations, family commitments, and any specific requirements that could affect their participation. The goal is to create a comprehensive overview that allows you to make informed decisions about scheduling and event design, ensuring maximum participant engagement and minimal logistical challenges.
Pro tip: Create a single, user friendly digital form that captures all necessary participant details in one seamless interaction to maximize response rates and data accuracy.
Here's how participant data management methods differ for event planning:
| Approach | Manual Tracking | Digital Forms | Automated Systems |
|---|---|---|---|
| Data Accuracy | Prone to entry errors | Generally high accuracy | Maximized accuracy |
| Response Speed | Slow and labor intensive | Quick and user friendly | Instant, real-time updates |
| Security | Limited protection | Secure, password protected | Strong encryption |
| Scalability | Difficult for large groups | Easy for any group size | Effortless at any scale |
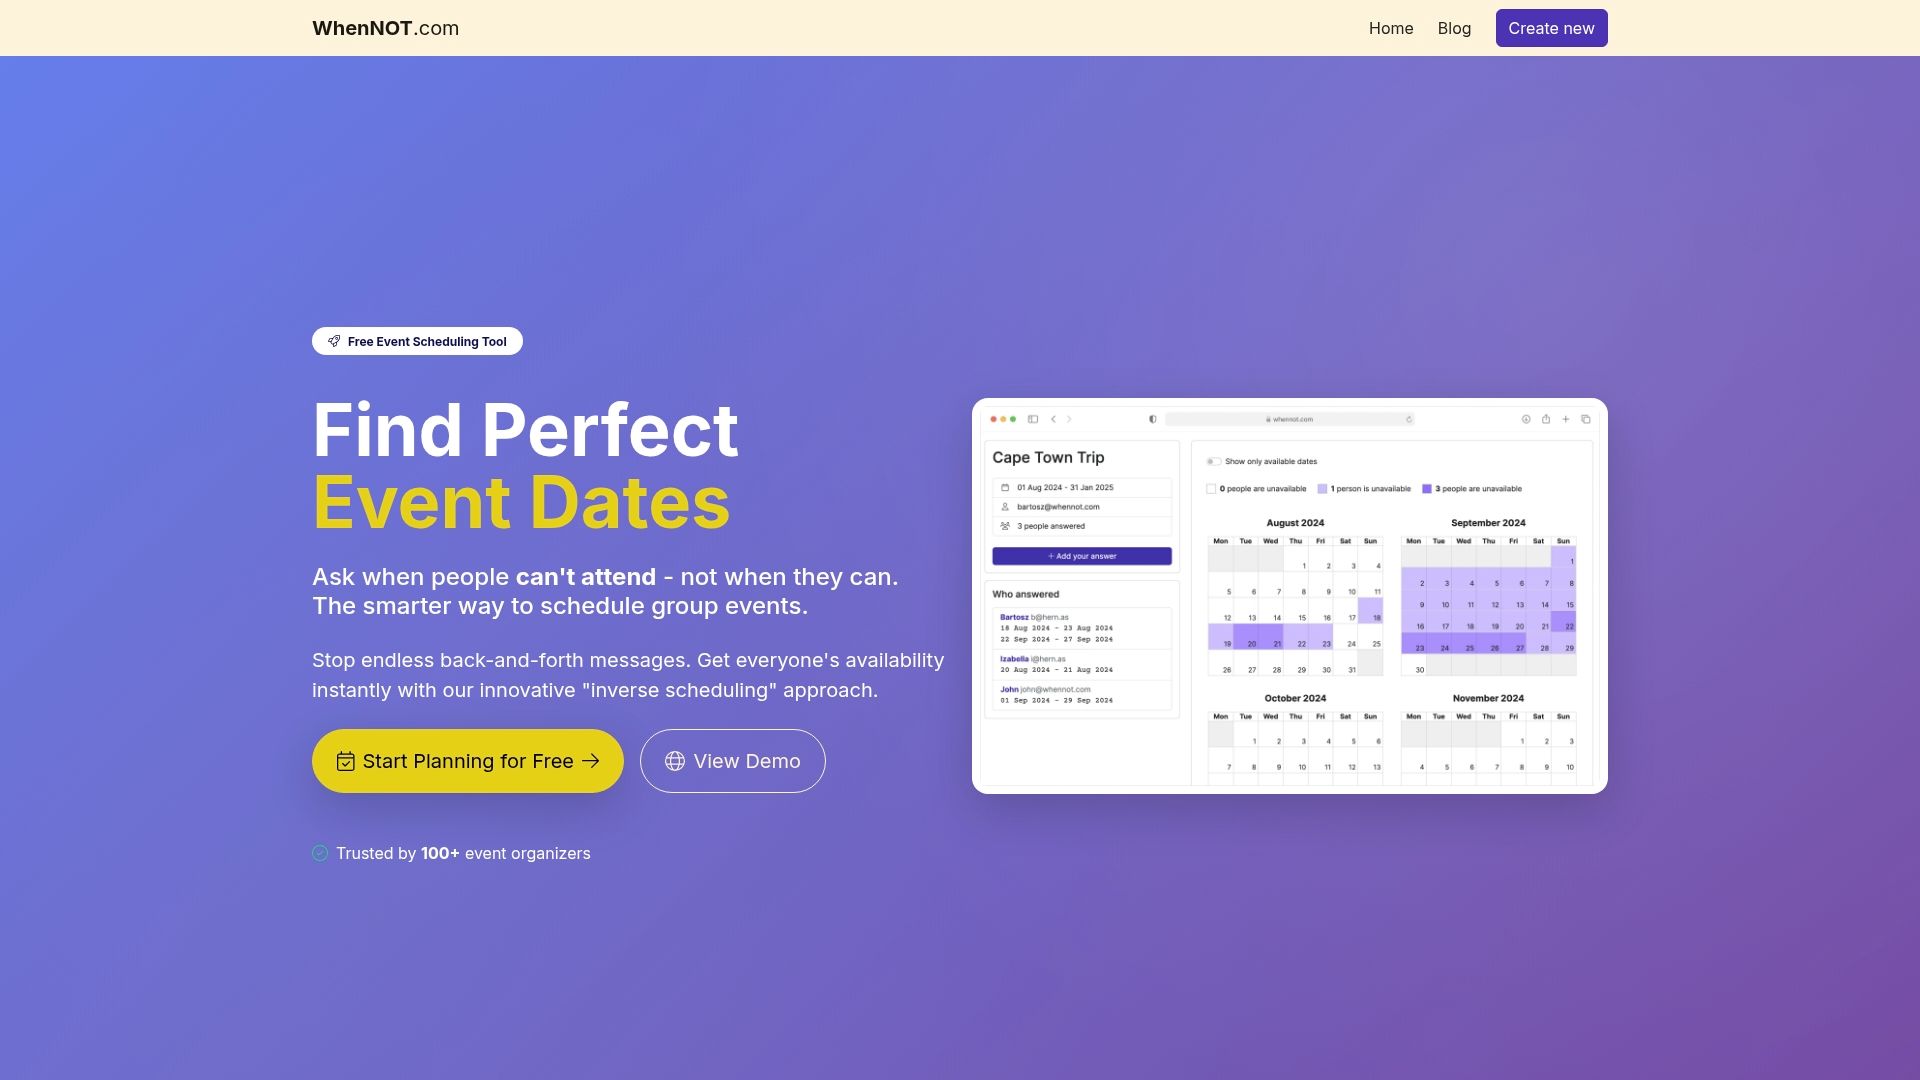
Step 3: Set up event in WhenNOT and share link
With participant information gathered, you are now ready to create your event in the WhenNOT platform. Web developers use advanced event handling techniques to create interactive scheduling interfaces that simplify the coordination process, and WhenNOT offers an intuitive approach to setting up your corporate event quickly and efficiently.
Navigate to the WhenNOT platform and start by entering your event details. Specify the potential date range that accommodates the majority of your participants based on the availability constraints you previously collected. The platform allows you to set a flexible window rather than demanding a single fixed date. Interactive scheduling tools enable dynamic link generation for participant access, so you can easily share your unique event link with team members. When generating the link, double check that it clearly communicates the event purpose and includes any necessary context to encourage participant engagement.
After creating your event, the system will generate a unique shareable link. Copy this link and distribute it through your preferred communication channels email, company messaging platform, or collaborative workspace. Ensure participants understand they should mark their unavailable dates, which allows the platform to automatically highlight the optimal scheduling windows for your corporate event.
Pro tip: Send the WhenNOT event link with a brief personalized message explaining the event context to increase participant response rates and clarity.
Step 4: Review participant responses and identify optimal dates
As participant responses start rolling in, you will need to systematically analyze the collected availability data to pinpoint the most suitable dates for your corporate event. Event management professionals emphasize the importance of carefully evaluating participant schedules and constraints to maximize overall attendance and engagement.
WhenNOT provides an intuitive visual interface that automatically aggregates participant responses, highlighting the dates with the least conflicts. Pay close attention to the color coded availability map that shows which dates work best for the majority of your participants. Look for date windows where the fewest number of people have marked themselves as unavailable. Consider additional contextual factors beyond pure availability such as potential travel requirements, critical team member schedules, and any known scheduling challenges you discovered during the initial participant information gathering phase.
Once you have identified the most promising date options, prepare a draft schedule for final confirmation. Create a clear summary of the proposed dates that shows how you arrived at these recommendations. Send a follow up communication to participants explaining the selected date range and providing an opportunity for final input or last minute adjustments. This collaborative approach ensures transparency and increases the likelihood of widespread participant acceptance.
Pro tip: Always have a backup date range identified in case your primary scheduling preference encounters unexpected conflicts.
Step 5: Confirm schedule and share final event details
With your optimal event dates selected, the next critical step is communicating the final schedule to all participants and stakeholders. Effective confirmation strategies involve distributing comprehensive event information to ensure clarity and alignment across your entire team and external participants.
Finalizing the event schedule requires confirming all critical details including precise timing, venue specifications, and logistical arrangements. Create a detailed event brief that includes the confirmed dates, specific timings, location address, parking information, recommended arrival times, and any special instructions for participants. Consider preparing a digital information packet that can be easily shared and referenced, which might include an agenda outline, speaker profiles, dress code recommendations, and any required pre event preparation materials.
Once you have compiled the comprehensive event details, send a formal communication to all participants. Use a clear and professional tone that conveys all necessary information while maintaining an inviting and enthusiastic approach. Include a mechanism for participants to confirm their attendance and provide an opportunity for them to ask any remaining questions. This final communication step transforms your carefully planned event from a scheduling exercise into an anticipated team experience.
This table summarizes core event details to confirm before communicating to participants:
| Detail | Importance | Example |
|---|---|---|
| Date and Time | Ensures clear attendance | May 10, 9:00 AM – 3:00 PM |
| Venue Address | Prevents confusion | 123 Business Rd, Suite 400 |
| Agenda Outline | Guides participant focus | Keynote, workshops, networking |
| Arrival Instructions | Supports smooth logistics | Park in Lot B, arrive by 8:30 |
Pro tip: Create a shareable digital event brief with all key information to reduce individual questions and ensure consistent communication across your participant group.
Streamline Your Corporate Event Scheduling with WhenNOT
Planning a corporate event involves juggling participant availability, managing multiple schedules, and ensuring clear communication—all common pain points highlighted in the "Corporate Event Scheduling Checklist for Efficient Planning." From gathering participant constraints to identifying optimal dates, the event planning process can feel overwhelming without the right tools. WhenNOT addresses these challenges by simplifying scheduling through its innovative inverse scheduling method. Instead of asking when attendees are free, it asks when they are busy, making it easier to find dates that work for everyone in just a few clicks.
Boost your event planning efficiency today by trying WhenNOT. Create your event, share the unique link, and watch availability data gather effortlessly—no accounts or complicated sign-ups needed. This approach saves you time, reduces planning frustrations, and helps maximize attendance. Visit WhenNOT’s landing page now and experience the easiest way to coordinate corporate events with confidence.
Frequently Asked Questions
What are the first steps in creating a corporate event schedule?
To start, define the event's scope and requirements. Identify the primary purpose, expected attendees, budget, and key outcomes before documenting these details to guide your planning process.
How can I effectively gather participant information for scheduling?
Create a digital form to collect key details like names, job roles, and availability preferences from participants. This approach can enhance response rates and accuracy, helping you manage logistics more efficiently.
What should I do after collecting participant responses?
Review the availability data using visualization tools to identify the most suitable dates for your event. Highlight the dates with the least conflicts and consider critical team members' schedules when making your final selections.
How do I confirm and communicate the final event schedule?
Compile all essential details, including confirmed dates, venue address, and agenda outline into a clear digital packet. Share this information with all participants, allowing them to confirm their attendance and ask any remaining questions.
What should be included in an event requirements document?
Your event requirements document should capture the target audience demographics, preferred dates, venue options, technology needs, and any unique considerations. This comprehensive overview will keep your planning process focused and aligned with your organizational goals.