
Almost ninety percent of American event coordinators report that traditional group scheduling wastes valuable time and causes needless frustration. Organizing multi-day retreats or collaborative projects can quickly become chaotic as conflicting calendars pile up. This practical guide walks you through a smarter process for finding the best dates, using proven methods that cut the endless email chains and let your team focus on productive planning.
Table of Contents
- Step 1: Set up Your Scheduling Event With WhenNOT
- Step 2: Define Potential Date Ranges And Customize Settings
- Step 3: Share The Event Link With All Participants
- Step 4: Ask Members To Mark Their Unavailable Dates
- Step 5: Review And Verify Collected Availability Data
- Step 6: Identify And Finalize The Best Meeting Dates
Quick Summary
| Key Insight | Explanation |
|---|---|
| 1. Simplify scheduling with WhenNOT | Use WhenNOT for easy group scheduling by marking unavailability, reducing back-and-forth communication. |
| 2. Customize date ranges thoughtfully | Set broad date ranges to maximize participation and accommodate participants' complex schedules. |
| 3. Choose effective communication channels | Share the event link through appropriate channels to ensure clear instructions and prompt responses. |
| 4. Encourage thorough input from participants | Request comprehensive unavailable dates from participants to enhance scheduling accuracy and ease. |
| 5. Review data for optimal dates | Analyze collected availability data visually to identify the best meeting times with minimal conflicts. |
Step 1: Set up your scheduling event with WhenNOT
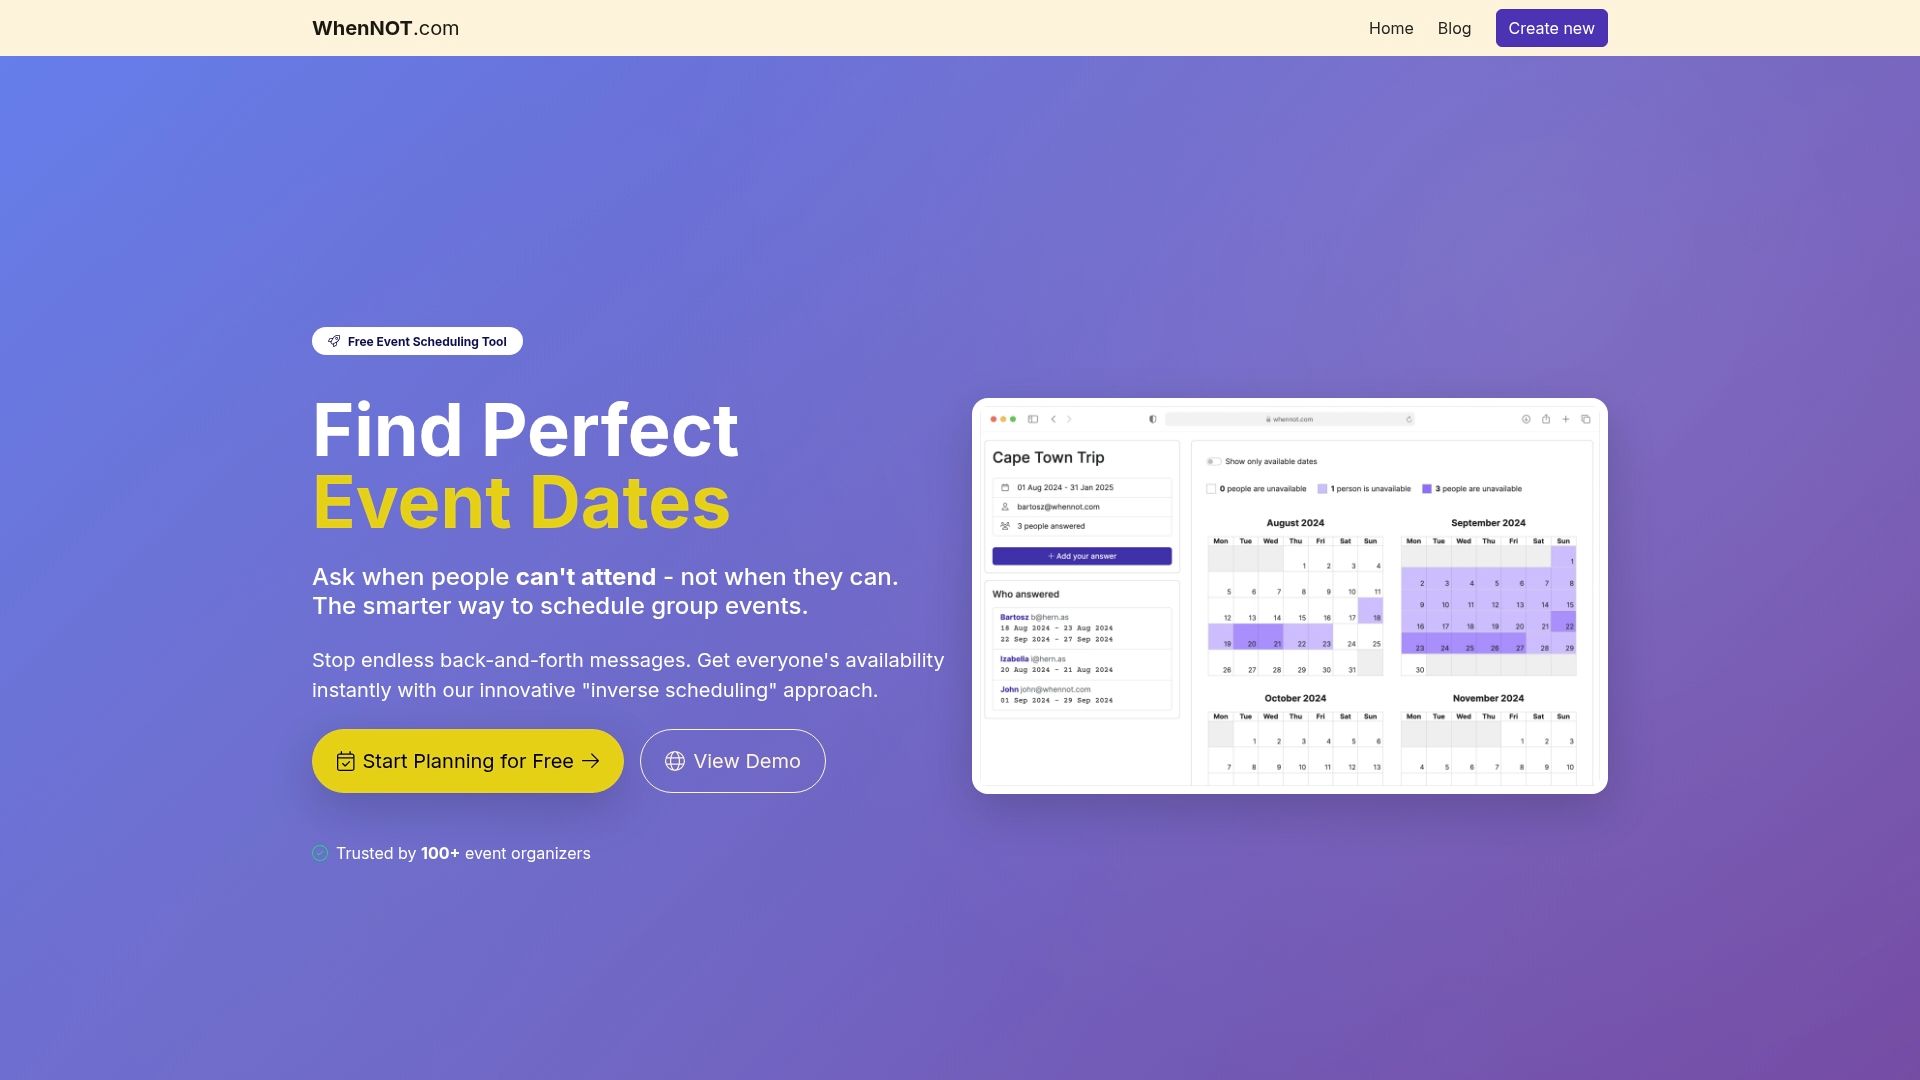
Creating a group event with WhenNOT is a straightforward process that helps you quickly find the perfect time for everyone. By leveraging an innovative scheduling approach for group events, you can eliminate the back-and-forth communication typically associated with coordinating multiple schedules.
To get started, navigate to the WhenNOT platform and click the "Create Event" button. You will need to provide some basic details about your event, including a descriptive title and the potential date range you are considering. The platform allows you to set a broad timeframe, giving participants flexibility in indicating their unavailable dates. Unlike traditional scheduling tools, WhenNOT simplifies the process by asking participants to mark when they cannot attend, which often proves more intuitive and faster than selecting available slots.
After setting up your event details, you will receive a unique sharing link. Send this link to all participants through email, messaging apps, or your preferred communication channel. Participants can then quickly input their unavailable dates without creating an account or going through complex registration processes. The platform will automatically generate a visual representation of everyone's busy days, making it easy to identify the optimal meeting time that works for the entire group.
Pro tip: Before sharing the event link, double-check your potential date range to ensure it provides enough flexibility for all participants to respond comfortably.
Here is a comparison of common group scheduling approaches:
| Approach | Participant Effort | Speed to Consensus | Flexibility for Large Groups |
|---|---|---|---|
| Traditional Polling | High - select all possible dates | Slow - requires back-and-forth | Often cumbersome |
| WhenNOT (unavailability) | Low - mark only conflicts | Fast - reduces iterations | Highly scalable |
| Email Coordination | Very high - multiple replies | Very slow | Not suitable |
Step 2: Define potential date ranges and customize settings
Defining the right date ranges and customizing your event settings can significantly streamline your group scheduling process. Tailoring your event parameters helps accommodate everyone's scheduling needs while ensuring maximum participation and flexibility.

When setting up your potential date ranges, consider the breadth of time that makes sense for your specific event. WhenNOT allows you to select a broad timeframe that gives participants maximum flexibility in indicating their unavailable periods. Think strategically about the range you choose some participants might have complex schedules or travel commitments that require wider windows for response. For instance, if you are planning a multi-day corporate retreat, you might want to set a range spanning several weeks to capture everyone's potential conflicts.
The platform offers robust customization options to fine tune your event settings. You can specify buffer times between potential meeting slots, set limits on the number of potential dates, and configure notification preferences. These advanced scheduling customization features ensure that the scheduling process remains smooth and respects both individual and group constraints. Pay special attention to setting realistic time ranges that provide participants enough context to accurately report their unavailable dates.
Pro tip: Create a date range slightly broader than your actual event needs to give participants extra flexibility in reporting their schedule conflicts.
Below is a summary of advanced scheduling settings available in WhenNOT:
| Setting | Purpose | Business Impact |
|---|---|---|
| Buffer Times | Prevents back-to-back meetings | Reduces participant fatigue |
| Date Range Limits | Controls scheduling window | Ensures realistic options |
| Notification Preferences | Keeps participants informed | Improves response rate |
Step 3: Share the event link with all participants
Sharing your event link efficiently is crucial to ensuring maximum participation from your group members. Distributing scheduling links effectively requires thoughtful communication strategies that encourage quick and comprehensive responses.
When sharing your unique WhenNOT event link, consider the communication channels most appropriate for your specific group. Email remains the most professional and reliable method for corporate settings, but messaging apps or team collaboration platforms might work better for more casual groups. Include a brief explanation about why you are requesting their availability and provide clear instructions on how to mark their unavailable dates. Personalize your message to increase the likelihood of prompt responses explain the event context, highlight the simplicity of the process, and emphasize how little time it will take to complete.
Each participant will receive a direct link that allows them to input their unavailable dates without creating an account or going through complex registration processes. This streamlined approach reduces barriers to participation and makes the scheduling process as frictionless as possible. Double-check that you have included all necessary participants and that the contact information you are using is current and accurate.
Pro tip: Send a follow-up reminder to participants who have not yet responded within 48 hours of your initial link distribution.
Step 4: Ask members to mark their unavailable dates
Effectively requesting group members to indicate their unavailable dates requires a strategic and considerate approach that encourages maximum participation and honest reporting. The WhenNOT platform simplifies this process by allowing participants to quickly mark their unavailable time slots without extensive effort.
When communicating with your group, craft a clear and concise message that explains the purpose of the scheduling request and provides straightforward instructions. Emphasize the simplicity of marking unavailable dates explain that the process takes less than a minute and directly contributes to finding the most convenient time for everyone. Avoid using language that sounds demanding instead, frame the request as a collaborative effort to find the best possible meeting time that accommodates most participants schedules.
Encourage participants to be comprehensive when marking their unavailable dates. This means considering not just work hours but also personal commitments, potential travel times, and other scheduling constraints. The more accurate and complete the information participants provide, the more effectively the platform can help you identify optimal meeting windows. Remind your group that marking unavailable dates is different from traditional scheduling they are simply indicating when they cannot attend, which often feels more intuitive and less stressful than trying to find perfect availability.
Pro tip: Include a brief deadline for responses in your initial communication to create a sense of urgency and ensure timely completion of the availability collection process.
Step 5: Review and verify collected availability data
Managing and analyzing group availability data requires careful attention to detail and strategic visualization to ensure accurate scheduling outcomes. WhenNOT simplifies this process by providing an intuitive interface that allows you to quickly assess participants unavailable time slots.
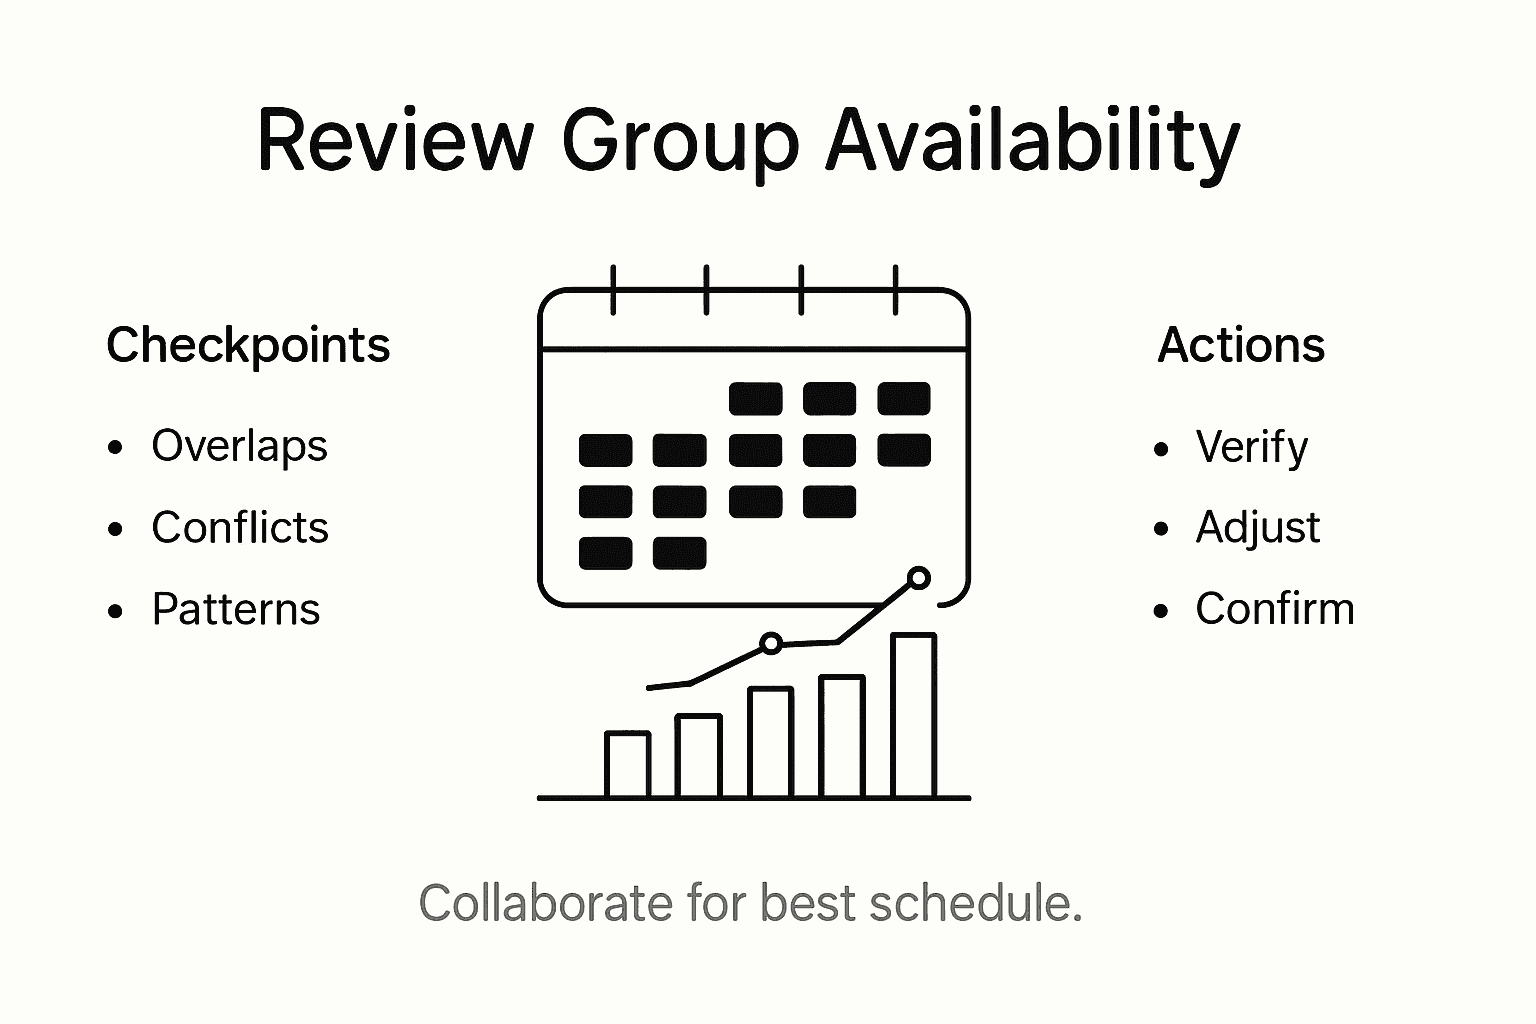
As you review the collected data, look for patterns and potential scheduling conflicts. Pay close attention to overlapping unavailable periods and identify the windows where most participants are free. The platform automatically highlights areas of maximum group availability, which helps you make informed decisions without extensive manual calculations. Consider the context of each participants marked dates look beyond just work hours and consider factors like travel time, personal commitments, and potential flexibility.
Be prepared to engage in some collaborative problem solving if the initial data reveals challenging scheduling scenarios. You might need to reach out to specific team members to understand the nuances behind their unavailability or explore alternative date ranges. Remember that the goal is not just finding a time slot but finding a time that works reasonably well for the majority of participants. The visual representation provided by WhenNOT makes this analysis intuitive and straightforward, allowing you to quickly identify optimal meeting windows.
Pro tip: When complex scheduling challenges arise, consider having a brief informal conversation with key participants to understand their constraints and potential flexibility.
Step 6: Identify and finalize the best meeting dates
Selecting the optimal meeting dates requires a strategic approach that balances group preferences and practical considerations. After collecting availability data through WhenNOT, you will want to methodically narrow down the most viable options.
Begin by identifying the top 2-3 potential date windows where the majority of participants are available. Look for time slots with the least number of conflicts and the most overlapping free periods. Pay attention to the visual representation provided by WhenNOT that highlights optimal meeting windows. Consider not just raw availability but also the context of each potential date including factors like proximity to important deadlines, travel schedules, and overall group convenience.
Once you have identified the most promising date ranges, share these options transparently with the entire group. Invite brief feedback to ensure no critical constraints were missed during the initial data collection. This collaborative approach allows participants to flag any last minute considerations and helps build consensus around the final selection. Set a clear deadline for responses to prevent endless discussion and maintain momentum in the scheduling process. The goal is to find a date that works reasonably well for most participants while respecting individual scheduling complexities.
Pro tip: When multiple strong date options exist, consider using a quick group vote to make the final selection and demonstrate inclusive decision making.
Simplify Your Group Scheduling with WhenNOT Today
Coordinating availability for group events can be frustrating and time consuming as this article highlights. Marking unavailable dates instead of selecting open slots changes the scheduling game by reducing participant effort and speeding consensus. If you are tired of endless email threads and complicated polls, WhenNOT offers a straightforward solution designed around this exact challenge. By creating an event, setting flexible date ranges, and sharing a simple link, you empower your group to effortlessly indicate their busy times without signups or confusion.
Take control of your event planning now by visiting WhenNOT. Discover how our platform’s unique approach and intuitive visual calendars help you quickly find optimal meeting dates that work for everyone. Get started with a free, privacy-focused tool built to streamline your scheduling and end the stress of coordinating group availability. Don’t wait too long—your next successful event is only a few clicks away at https://whennot.com.
Frequently Asked Questions
How do I set up my event on WhenNOT to collect member availability?
To set up your event on WhenNOT, click the "Create Event" button and provide a descriptive title along with a potential date range. After entering this information, you will receive a unique link to share with your participants for them to indicate their unavailable dates.
What is the best way to communicate the scheduling link to my group?
Use the communication channels that fit your group's dynamics, whether email or messaging apps. Provide a clear explanation of the purpose of the scheduling request and include simple instructions for marking unavailable dates to encourage quick responses.
How can I improve the likelihood of participants marking their unavailable dates?
To improve participation, craft a clear message that emphasizes the simplicity of marking unavailable dates, stating it takes less than a minute. Encourage thoroughness by reminding participants to consider all commitments, not just work hours.
What should I do if the initial availability data shows a lot of conflicts?
If you encounter many conflicts, engage in collaborative problem-solving by reaching out to specific participants to understand their constraints. Consider the context of their unavailability and explore alternative date ranges to find a suitable meeting time.
How do I finalize the best meeting dates after collecting availability?
Identify the top 2-3 potential date windows with the least conflicts from the collected availability data. Share these options with the group and invite feedback to ensure all critical constraints are considered before making a final decision.