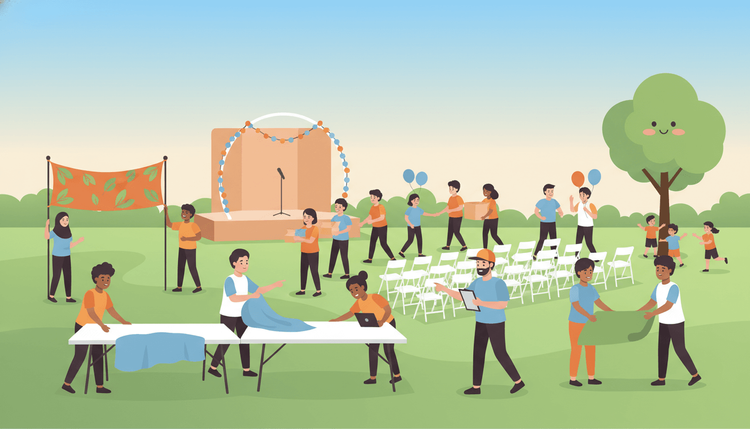
You want to bring people together. Maybe it is a neighborhood cleanup, a local art fair, or a block party that gives your community a reason to connect. But you have never organized anything like this before, and the whole process feels overwhelming.
Good news: organizing a community event is not as complicated as it seems. With the right steps and a clear plan, first-time organizers can pull off events that people talk about for months. This guide walks you through every stage, from your first idea to the post-event wrap-up.
Why Community Events Matter More Than Ever in 2026
Quick answer: Community events build real-world connections that digital interactions cannot replace. They strengthen neighborhoods, support local businesses, and create shared memories that keep communities thriving.
Remote work and digital communication changed how people interact. Many neighborhoods lost the casual, face-to-face connections that once happened naturally. Community events fill that gap.
A well-organized local event does three things at once. It gives people a reason to step outside their daily routines. It introduces neighbors who may have lived near each other for years without meeting. And it creates momentum for future community projects.
Research from the National Recreation and Park Association shows that communities with regular local events report higher resident satisfaction and stronger volunteer networks. You do not need a massive budget or years of experience to create that impact. You just need a plan.
Step 1: Define Your Event Purpose and Audience
Quick answer: Start by answering two questions: "Why are we doing this?" and "Who is it for?" A clear purpose keeps every decision focused, and knowing your audience shapes every detail from the venue to the food.
Before you book a venue or design a flyer, write down your event purpose in one sentence. "We want to raise $5,000 for the community garden" is better than "We want to do something fun." Specific goals guide your planning and help you measure success afterward.
Next, define your audience. A family-friendly street fair requires different planning than a networking event for local entrepreneurs. Think about age groups, interests, and accessibility needs.
Ask yourself these questions:
- What problem does this event solve for attendees?
- How many people do you realistically expect?
- What time of year works best for your target audience?
- Are there competing events in the same timeframe?
Write your answers down. This one-page brief becomes your north star for every decision that follows.
Step 2: Build Your Organizing Committee
Quick answer: You cannot organize a community event alone. Recruit 3 to 8 reliable people with different skills, assign clear roles, and establish a regular meeting schedule from day one.
Solo event planning leads to burnout and missed details. The strongest community events have small, focused teams where each person owns a specific area.
Start by identifying people in your network who bring different strengths. You need someone comfortable with finances, someone who knows local venues, someone with social media skills, and someone who excels at logistics. Reach out personally rather than posting a generic call for volunteers. People respond better to direct, specific asks.
Assign clear roles early:
- Event coordinator (you): Overall vision, timeline, and decision-making
- Logistics lead: Venue, equipment, setup, and teardown
- Communications lead: Marketing, social media, and community outreach
- Finance lead: Budget tracking, sponsorships, and ticket sales
- Volunteer coordinator: Recruiting and managing day-of helpers
Set up a regular meeting cadence. Biweekly meetings work well in the early planning stages, shifting to weekly as the event approaches. Use a shared document or project board to track tasks and deadlines.
For a deeper look at managing your team and coordinating volunteers, check out our guide on community event management with volunteers, venues, and schedules.
Step 3: Pick a Date That Works for Everyone
Quick answer: Choosing the right date is one of the hardest parts of community event organization. Avoid major holidays, check for competing local events, and use scheduling tools that find gaps in everyone's availability.
A perfect event on the wrong date is a poorly attended event. Date selection deserves serious attention, not a quick group text where the loudest voice wins.
Start with the basics. Avoid major holidays, long weekends when people travel, and dates that conflict with popular local events. Check your city's event calendar and school schedules. If your audience includes families, school breaks and exam periods matter.
Then factor in your committee's availability. With 5 to 8 organizers, finding a date where everyone can be present for setup, the event itself, and teardown gets complicated fast. Traditional methods like group chats or email threads often lead to endless back-and-forth.
How Inverse-Availability Scheduling Saves Time
Instead of asking everyone "When are you free?" (which creates dozens of conflicting responses), try the opposite approach. Ask people to share when they are NOT available, and let the open windows reveal themselves.
WhenNOT uses this inverse-availability approach to find the dates that actually work for groups. Rather than sorting through a wall of "maybe" responses, you see the clear gaps where your whole committee can show up. It is especially useful when coordinating across multiple busy schedules.
Ready to find the perfect date for your community event? Start a free scheduling poll with WhenNOT and skip the back-and-forth.
For more tips on building a reliable event planning workflow, see our event planning workflow framework.
Step 4: Secure a Venue and Permits
Quick answer: Match your venue to your event size and type. Contact local parks departments, community centers, or private spaces early, and research permit requirements at least 8 to 12 weeks before your event date.
Your venue sets the tone for your entire event. A neighborhood park works for a casual picnic gathering. A community center suits workshops or presentations. A closed-off street creates energy for block parties and fairs.
When evaluating venues, consider:
- Capacity: Can it comfortably hold your expected attendance plus 20%?
- Accessibility: Is it reachable by public transit? Does it accommodate people with mobility challenges?
- Amenities: Are there restrooms, parking, electrical outlets, and shade or shelter?
- Cost: Many public spaces offer free or reduced rates for community events.
- Rain plan: Do you have an indoor backup or can you rent tents?
Permits vary widely by city and event type. Contact your local parks and recreation department or city clerk's office at least 8 to 12 weeks ahead. Common permits include:
- Public space usage permits
- Noise permits (if you have amplified music or speakers)
- Food service permits (if vendors are selling food)
- Alcohol licenses (if applicable)
- Road closure permits (for street fairs or runs)
Start this process early. Permit approvals can take weeks, and delays here cascade through your entire timeline.
Step 5: Plan Activities and Entertainment
Quick answer: Design a mix of activities that keeps different age groups and interest levels engaged. Build a simple timeline with anchor events, filler activities, and downtime so the event flows naturally.
The best community events feel effortless to attend. That does not happen by accident. It happens because organizers built a schedule that balances structured activities with free time.
Start with one or two anchor activities. These are the main attractions that draw people in: a live band, a keynote speaker, a cooking competition, or a group volunteer project. Schedule these at strategic times to keep energy high.
Fill the gaps with low-effort, high-engagement activities:
- Interactive booths or stations (craft tables, face painting, info tables)
- Games and competitions with small prizes
- Food trucks or potluck stations
- Photo opportunities or community art projects
- Kids' activity zones
Build a rough timeline for your event day. A four-hour community fair might look like this:
| Time | Activity |
|---|---|
| 10:00 AM | Gates open, welcome booth, music starts |
| 10:30 AM | Opening remarks, community announcements |
| 11:00 AM | Main activity begins (cooking contest, talent show, etc.) |
| 12:00 PM | Lunch break, food vendors active |
| 1:00 PM | Second anchor activity or guest speaker |
| 1:45 PM | Raffle drawing, community awards |
| 2:00 PM | Closing remarks, cleanup begins |
Leave 10 to 15 minutes of buffer between activities. Things always run longer than planned.
Step 6: Promote Your Event Locally
Quick answer: Combine digital and physical promotion to reach your full community. Start marketing 4 to 6 weeks before the event using social media, local businesses, community boards, and word-of-mouth networks.
Even the best-planned event fails without attendees. Promotion should start 4 to 6 weeks before the event date and intensify in the final two weeks.
Digital promotion:
- Create a simple event page with the date, time, location, and what to expect
- Post in local Facebook groups, Nextdoor, and community forums
- Share updates and behind-the-scenes content on Instagram and X
- Send email announcements through neighborhood associations or school newsletters
- List your event on local event calendars and community websites
Physical promotion:
- Hang flyers at coffee shops, libraries, grocery stores, and community centers
- Place yard signs along busy streets (check local rules first)
- Partner with local businesses to cross-promote
- Ask schools to include the event in parent newsletters
Word of mouth:
- Ask every committee member to personally invite 10 people
- Reach out to local influencers, bloggers, or community leaders
- Connect with other community organizations for co-promotion
Create a simple, memorable message. "Riverside Block Party, June 14, 10 AM to 2 PM, Free for All Families" tells people everything they need in one line. Use that message consistently across every channel.
Step 7: Manage RSVPs and Attendance
Quick answer: Use a simple RSVP system to estimate attendance, plan for catering and seating, and communicate last-minute updates to confirmed guests. Free online tools make this easy even for first-time organizers.
Knowing how many people plan to attend changes everything about your logistics. It affects food quantities, seating arrangements, parking plans, and volunteer staffing.
For free community events, a formal RSVP helps but expect 60 to 70% of confirmed RSVPs to actually show up. For ticketed events, your numbers will be more accurate.
Keep your RSVP process simple:
- Use a free online form or event page
- Ask only for essential information: name, number of guests, any accessibility needs
- Send a confirmation with event details and parking instructions
- Follow up with a reminder 48 hours before the event
If your event includes specific activities with capacity limits (workshops, tours, demos), manage separate sign-ups for those. This prevents overcrowding at popular stations.
Track your numbers in a shared spreadsheet that your whole committee can access. Update it weekly so everyone stays aligned on attendance projections.
For a complete planning checklist that covers RSVPs and more, see our community event planning checklist.
Step 8: Day-of Execution Checklist
Quick answer: Create a detailed day-of timeline, assign every task to a specific person, arrive early for setup, and prepare for the unexpected. A smooth event day comes from over-preparation, not luck.
Event day is when all your planning pays off. The key is having a minute-by-minute plan so your team knows exactly what to do and when.
Before the event (2 to 3 hours early):
- Arrive at the venue and do a walkthrough
- Set up tables, chairs, signage, and decorations
- Test all audio/visual equipment
- Confirm food vendors and entertainment are on schedule
- Brief volunteers on their roles, locations, and emergency procedures
- Set up registration/check-in table
- Place directional signage for parking and entrances
During the event:
- Station a greeter at the entrance
- Have one committee member act as the central point of contact
- Take photos and videos for social media and post-event content
- Monitor crowd flow and adjust layouts if areas get congested
- Keep a float of cash and a phone charger at the organizer table
- Stay on schedule but stay flexible
After the event:
- Begin cleanup immediately while you have volunteer energy
- Do a final walkthrough to ensure the venue is in original condition
- Collect all rental equipment and supplies
- Thank volunteers personally before they leave
- Secure any cash, equipment, or leftover materials
Emergency preparedness:
- Keep a first aid kit accessible
- Know the location of the nearest hospital
- Have a weather contingency plan ready to activate
- Assign one person as the safety coordinator
Step 9: Post-Event Follow-Up
Quick answer: The work is not done when the event ends. Send thank-you messages, share highlights, gather feedback, and document lessons learned within one week so your next event runs even smoother.
What you do in the week after your event determines whether it was a one-time thing or the start of something lasting.
Within 24 hours:
- Post event photos and a thank-you message on social media
- Send personal thank-you texts or emails to volunteers and sponsors
- Return any borrowed or rented equipment
Within one week:
- Send a feedback survey to attendees (keep it under 5 questions)
- Hold a debrief meeting with your committee
- Document what worked, what did not, and what you would change
- Settle all financial accounts and create a final budget summary
- Share attendance numbers and highlights with sponsors
For long-term community building:
- Create a mailing list from attendees who opted in
- Start a social media group or page for future events
- Set a tentative date for your next event while momentum is high
- Connect with new community members who expressed interest in volunteering
The debrief meeting is the most valuable step. Go through your timeline and discuss every phase honestly. Write down specific improvements, not just general feelings. "We needed 30 more chairs" is more useful than "Seating was tight."
Comparison Table: Community Event Types at a Glance
| Event Type | Best For | Typical Size | Budget Range | Planning Time | Permits Needed |
|---|---|---|---|---|---|
| Block party | Neighborhood bonding | 50 to 200 | $200 to $1,000 | 4 to 6 weeks | Road closure, noise |
| Charity fundraiser | Cause awareness and donations | 100 to 500 | $500 to $5,000 | 6 to 10 weeks | Varies by venue |
| Community cleanup | Environmental action | 20 to 100 | $50 to $300 | 2 to 4 weeks | Usually none |
| Cultural festival | Celebrating diversity | 200 to 2,000 | $2,000 to $15,000 | 8 to 16 weeks | Multiple permits |
| Outdoor movie night | Family entertainment | 50 to 300 | $300 to $1,500 | 3 to 5 weeks | Space, noise |
| Farmers market | Supporting local vendors | 100 to 500 | $500 to $3,000 | 8 to 12 weeks | Food, space, vendor |
| Sports tournament | Active community engagement | 50 to 300 | $200 to $2,000 | 4 to 8 weeks | Space, insurance |
| Workshop or seminar | Skill-sharing and education | 15 to 50 | $100 to $500 | 2 to 4 weeks | Usually none |
Use this table as a starting point. Your budget and timeline will depend on your specific community, location, and goals.
FAQ
How far in advance should I start planning a community event?
For small events like cleanups or movie nights, 3 to 4 weeks is enough. Medium events like block parties need 6 to 8 weeks. Large festivals or fundraisers require 10 to 16 weeks of planning. Start with your event date and work backward to set milestones for permits, venue booking, and promotion.
How much does it cost to organize a community event?
Costs vary widely. A community cleanup might cost under $100 for supplies. A block party typically runs $500 to $1,500 for food, entertainment, and permits. Larger events can cost $5,000 or more. Offset costs through local business sponsorships, small ticket fees, or community association budgets.
How do I find volunteers for my community event?
Start with your personal network and ask each person to recruit one more. Post in local community groups on social media and Nextdoor. Reach out to local schools, churches, and civic organizations. Be specific about time commitments and roles so people know exactly what they are signing up for.
What if it rains on event day?
Always have a weather contingency plan. Options include moving indoors, renting tents or canopies, rescheduling to a rain date (announce this in advance), or modifying the schedule to work in covered areas. Check the forecast starting one week out and make your call 24 to 48 hours before the event.
Do I need insurance for a community event?
It depends on the event type and venue. Many public parks require event liability insurance. If your event involves physical activities, food service, or alcohol, insurance is strongly recommended. Single-event policies typically cost $150 to $300 and protect both organizers and attendees. Contact your local parks department for specific requirements.
How do I measure whether my community event was successful?
Compare your results against the goals you set in Step 1. Track attendance numbers, funds raised (if applicable), volunteer participation, and social media engagement. Send a post-event survey to measure attendee satisfaction. Success is not always about size. A gathering of 30 engaged neighbors can have more community impact than a festival of 500 strangers.
Ready to schedule your next group event without the headache? Find the perfect dates in minutes with WhenNOT.